Another question has been asked to our Salesforce developers so we thought best to share it with the Salesforce development world. Dependent picklist is very useful within the Salesforce CRM for many reasons. It is used to limit the list of values in one picklist based on the value of another picklist.
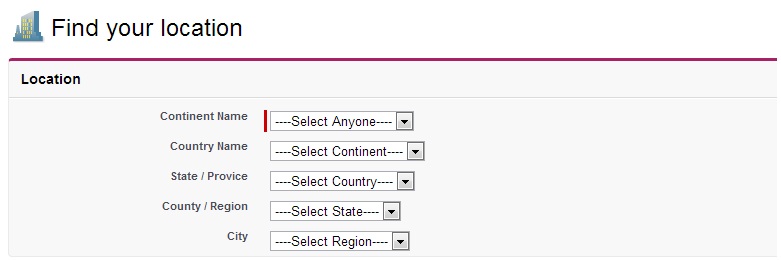
An example would be if you had a list of continents, countries, states, regions and major cities. If you select a Continent as an example, you would want the country to be filtered in the next picklist within Salesforce. The country selected should then limit the states that would be available for selection and so on.
Displaying dependent picklists is very simple with a Visualforce page. Let’s assume that we have custom objects called continents, country, state, region and major cities. These are all the objects that are related to each other by the Lookup field within Salesforce.
In this simple example we are going to make 5 different objects within Salesforce. These will be continents, country, state, region and major cities. We will create 4 lookup fields as well. The first lookup field in country will be linked with continent, the second lookup field is state and is linked with country. The third lookup field is region and is linked with state and so on.
If you follow these simple steps within Salesforce, you can create a dynamic dependent picklist:
Step 1 -
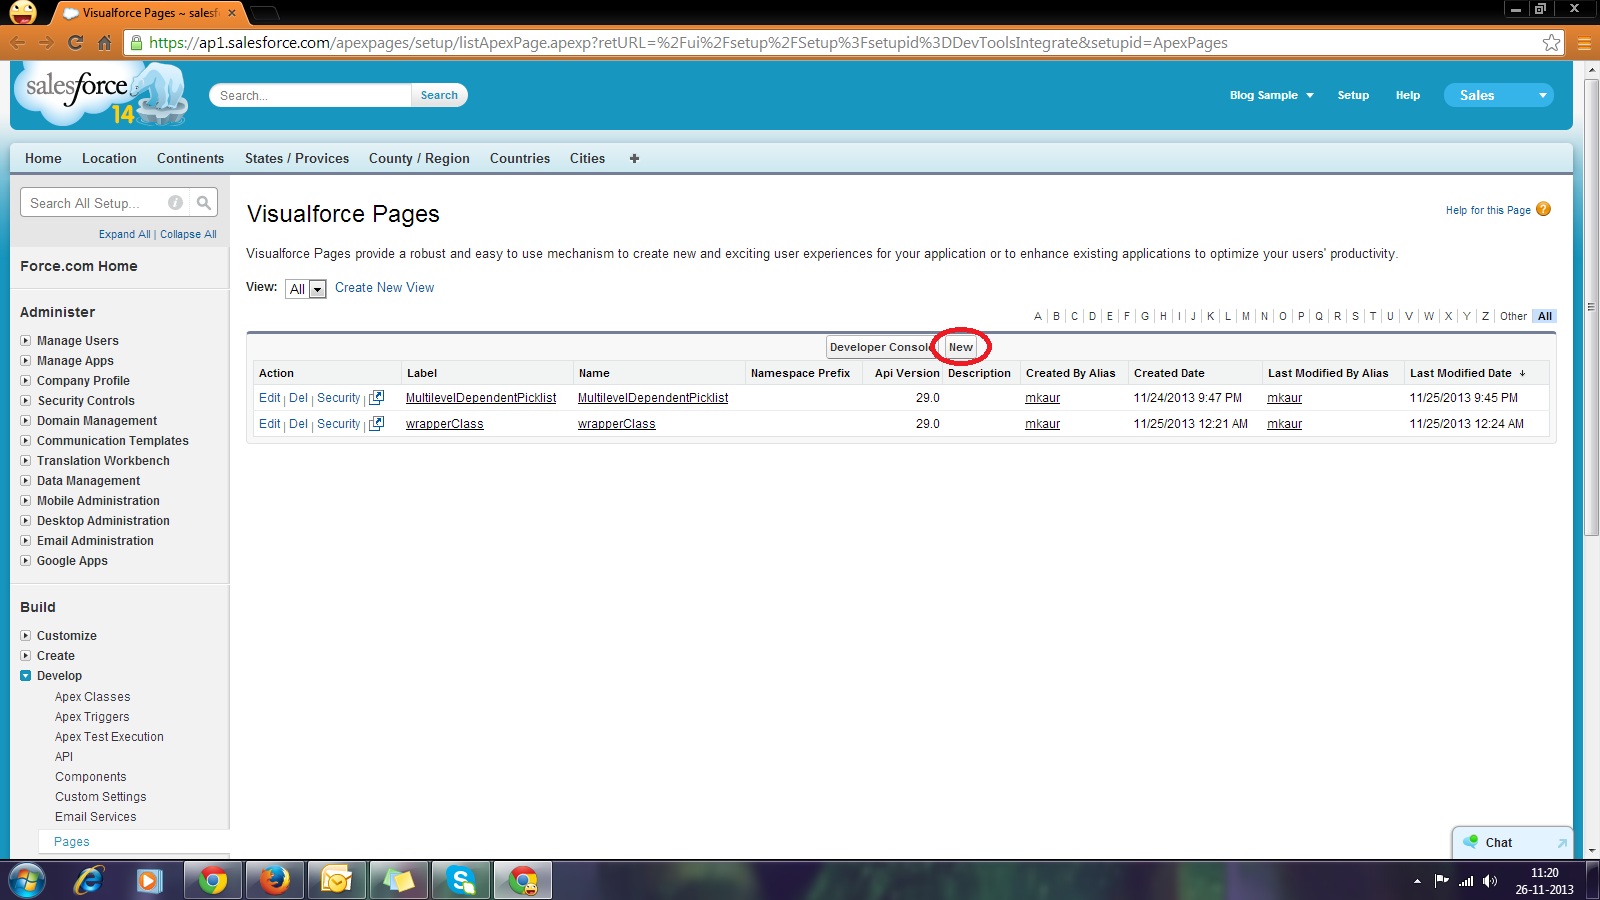
Go To Setup a Develop a Apex Classes
Click the “New” button for creating new Apex class:
Copy this code and paste it in your editor
| public class MultilevelDependentPicklist {public string conti{get; set;} public string contr{get; set;} public string stat{get; set;} public string regi{get; set;} public string city{get; set;} public MultilevelDependentPicklist(ApexPages.StandardController controller) { } public list<selectoption> getcontinentobj(){list<selectoption> options= new list<selectoption>(); list<Continent__c> conti= [select name from Continent__c order by name]; options.add(new selectoption(‘—-Select Anyone—-‘, ‘—-Select Anyone—-‘)); for(Continent__c c:conti){options.add(new selectoption(c.name,c.name)); } return options;
}
public list<selectoption> getcontryobj(){
list<selectoption> options= new list<selectoption>();
list<Country__c> contr= [select name from Country__c where Continent__r.name=:conti];
options.add(new selectoption(‘—-Select Continent—-‘, ‘—-Select Continent—-‘));
for( Country__c c:contr){
options.add(new selectoption(c.name,c.name));
}
return options;
}
public list<selectoption> getstateobj(){
list<selectoption> options= new list<selectoption>();
list<State_Provice__c> stat= [select name from State_Provice__c where Country__r.name=:contr];
options.add(new selectoption(‘—-Select Country—-‘, ‘—-Select Country—-‘));
for(State_Provice__c s:stat){
options.add(new selectoption(s.name,s.name));
}
return options;
}
public list<selectoption> getregionobj(){
list<selectoption> options= new list<selectoption>();
list<County_Region__c> regi= [select name from County_Region__c where State_Provice__r.name=:stat];
options.add(new selectoption(‘—-Select State—-‘, ‘—-Select State—-‘));
for(County_Region__c r:regi){
options.add(new selectoption(r.name,r.name));
}
return options;
}
public list<selectoption> getcityobj(){
list<selectoption> options= new list<selectoption>();
list<City__c> city= [select name from City__c where County_Region__r.name=:regi];
options.add(new selectoption(‘—-Select Region—-‘, ‘—-Select Region—-‘));
for(City__c c:city){
options.add(new selectoption(c.name,c.name));
}
return options;
}
}
|
Step 2 -
Go To Setup a Develop a Pages
Click the “New” button for creating new Visualforce pages within Salesforce
Step 3 -
In the label and name box type “Multi-level Dependent Picklist” within Salesforce
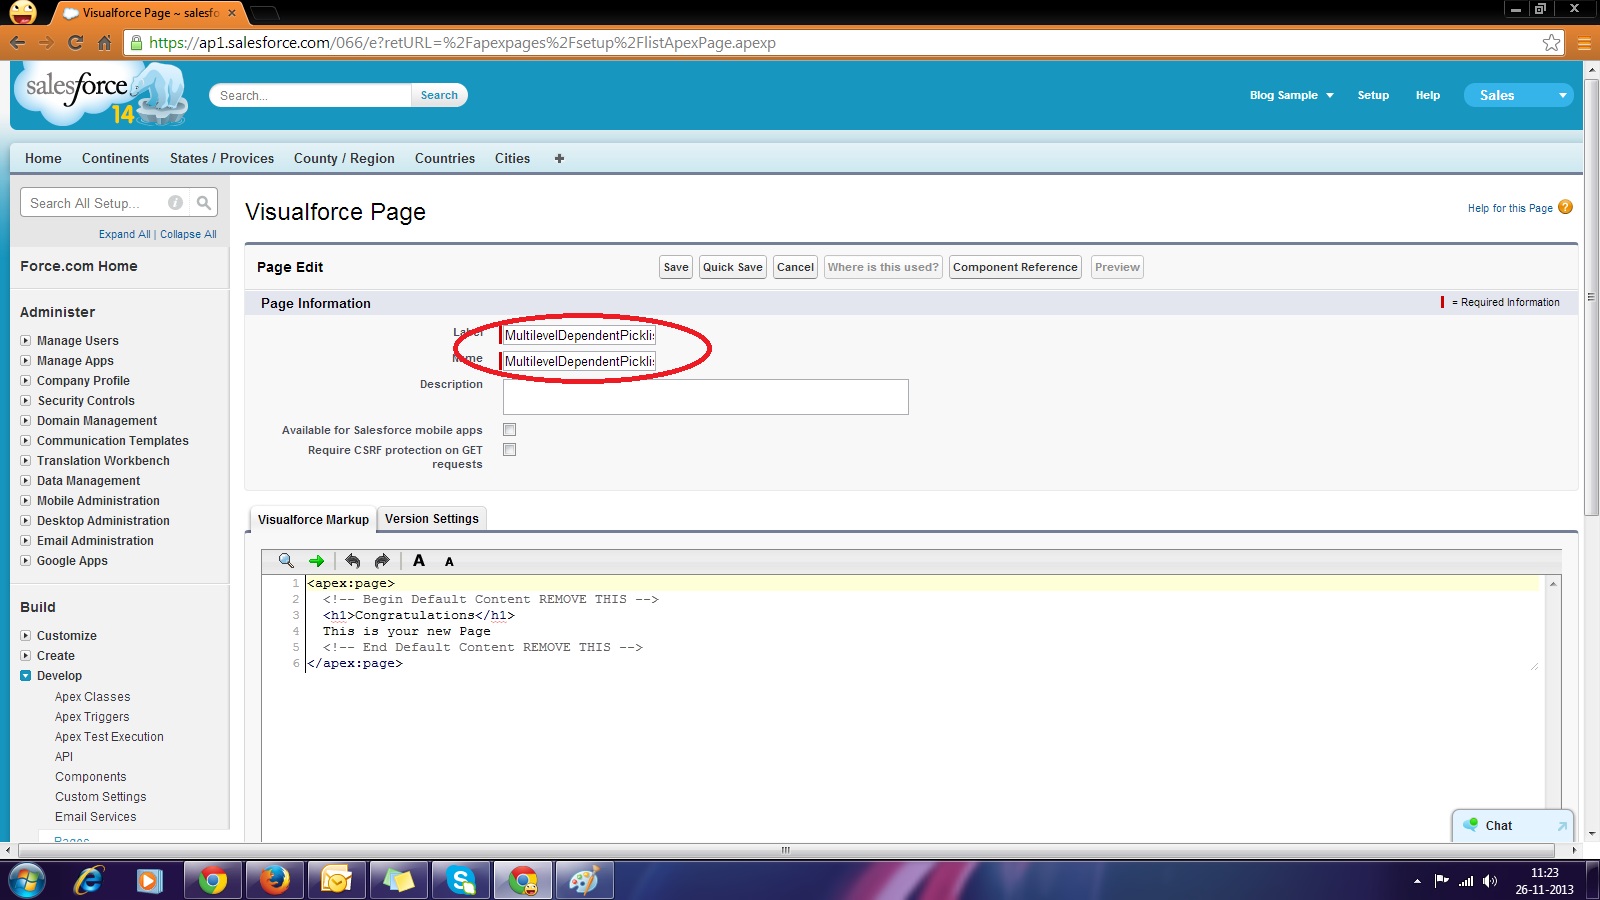
Step 4 –
In the Visualforce page editor paste this following code:
| <apex:page standardController=”Continent__c” extensions=”MultilevelDependentPicklist”> <apex:sectionHeader title=”Find your location” subtitle=”{!Continent__c.name}”/> <apex:form > <apex:pageBlock title=”Location” mode=”edit”> <apex:pageBlockSection columns=”1″> <apex:pageblockSectionItem > <apex:outputLabel value=”Continent Name”/> <apex:outputPanel styleClass=”requiredInput” layout=”block”> <apex:outputPanel styleClass=”requiredBlock” layout=”block”/> <apex:selectList size=”1″ value=”{!conti}”> <apex:selectoptions value=”{!continentobj}”/> <apex:actionSupport event=”onchange” reRender=”country”/> </apex:selectList> </apex:outputPanel>
</apex:pageblockSectionItem>
<apex:pageblockSectionItem >
<apex:outputLabel value=”Country Name”/>
<apex:selectList size=”1″ value=”{!contr}” id=”country”>
<apex:selectoptions value=”{!contryobj}”/>
<apex:actionSupport event=”onchange” reRender=”states”/>
</apex:selectList>
</apex:pageblockSectionItem>
<apex:pageblockSectionItem >
<apex:outputLabel value=”State / Provice”/>
<apex:selectList size=”1″ value=”{!stat}” id=”states”>
<apex:selectoptions value=”{!stateobj}”/>
<apex:actionSupport event=”onchange” reRender=”regions”/>
</apex:selectList>
</apex:pageblockSectionItem>
<apex:pageblockSectionItem >
<apex:outputLabel value=”County / Region”/>
<apex:selectList size=”1″ value=”{!regi}” id=”regions”>
<apex:selectoptions value=”{!regionobj}”/>
<apex:actionSupport event=”onchange” reRender=”cities”/>
</apex:selectList>
</apex:pageblockSectionItem>
<apex:pageblockSectionItem >
<apex:outputLabel value=”City”/>
<apex:selectList size=”1″ value=”{!city}” id=”cities”>
<apex:selectoptions value=”{!cityobj}”/>
<apex:actionSupport event=”onchange” reRender=”village”/>
</apex:selectList>
</apex:pageblockSectionItem>
</apex:pageBlockSection>
</apex:pageBlock>
</apex:form>
</apex:page>
|
“Save” this code.
Step 5-
Check it and make sure it’s working correctly. Enjoy!
No comments:
Post a Comment