Lightning Component Creation (Account List Example):
To create a Lightning Component we have different tools . For now we are going to use developer console to create Component.
Navigation:
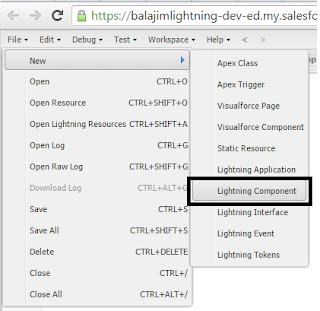
Give Name "AccountsComponent"
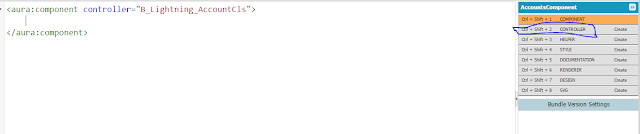
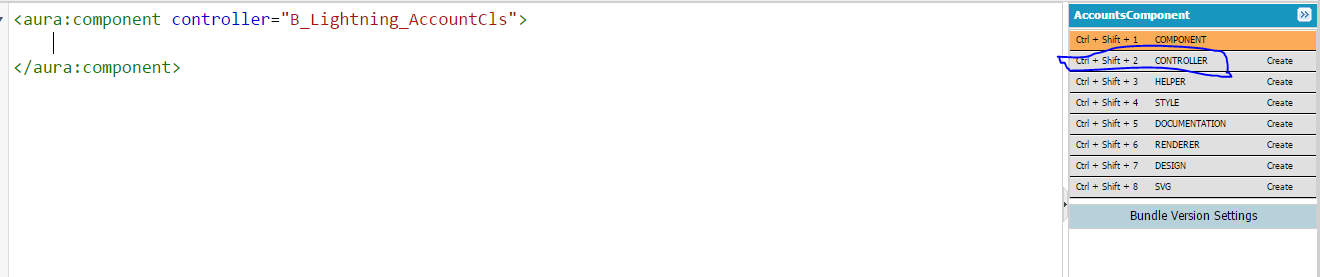
 After click on "Submit" you can get the Component with Lightning Bundle at right Panel.

Now create an apex class(Server Side Controller) with "@Auraenabled" methods which will be used in the above component.
Controller:
public with sharing class B_Lightning_AccountCls {
@Auraenabled
public static List<Account> retrieveAccounts(){
List<Account> accountList = new List<Account>();
accountList = [select id,name,AnnualRevenue,Industry,Website from Account limit 5];
return accountList;
}
}
Now include the controller in the component by using "controller" attribute.
<aura:component controller="B_Lightning_AccountCls">
</aura:component>
Use <aura:atrribute> tag to hold the values from the javascript controller .
<aura:attribute name="Accounts" type="Account[]"/>
Here the "init" handler used for performing action when component initialized.
<aura:handler name="init" action="{!c.myAction}" value="this"/>
Here "myAction" is a method in "controller" which we can create from the "controller" in lightning bundle .
Component Code:
<aura:component controller="B_Lightning_AccountCls">
<ltng:require styles="{!$Resource.Lightning_slds+'/assets/styles/salesforce-lightning-design-system.css'}"/>
<ltng:require styles="{!$Resource.Lightning_slds+'/assets/styles/salesforce-lightning-design-system.min.css'}"/>
<aura:attribute name="Accounts" type="Account[]"/>
<aura:handler name="init" action="{!c.myAction}" value="this"/>
<div class="container">
<div class="slds">
<br/>
<ul class="slds-has-dividers--around-space">
<li class="slds-item">
<div class="slds-tile slds-tile__detail">
<strong>Accounts Info</strong>
</div>
</li>
<aura:iteration items="{!v.Accounts}" var="accountObj">
<li class="slds-item">
<div class="slds-tile slds-tile--board">
<p class="slds-truncate" title="Anypoint Connectors"><a href="javascript:void(0);">{!accountObj.Name}</a></p>
<div class="slds-tile__detail slds-text-body--small">
<p class="slds-text-heading--medium">{!accountObj.AnnualRevenue}</p>
<p class="slds-truncate"><a href="javascript:void(0);">{!accountObj.Website}</a></p>
<p class="slds-truncate">{!accountObj.Industry}</p>
</div>
</div>
</li>
</aura:iteration>
</ul>
</div>
</div>
</aura:component>
Click on "Controller" to create method.
Controller Code:
({
myAction : function(component, event, helper) {
var action = component.get("c.retrieveAccounts");
action.setCallback(component,function(data){
component.set("v.Accounts",data.getReturnValue());
});
$A.enqueueAction(action);
}
})
var action = component.get("c.retrieveAccounts"); //This is used for invoking the method
Now we have completed component creation.
Now create a lighning app to see our output:
Navigation:

Now Give Name "AccountsApp" for application:

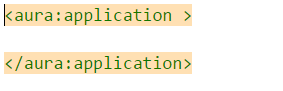
Click on Submit and then we can see app with the following tag:
 Now include your component by using "<c:componentName/>
<aura:application>
<c:AccountsComponent/>
</aura:application>
Now include your component by using "<c:componentName/>
<aura:application>
<c:AccountsComponent/>
</aura:application>
Note the if we are creating package use package namespace in the place of "c" for specifying the component.
Eg:<baluPackage:AccountsComponent/>
Here baluPckage is the name space.
To see your out put click on "Preview" in the Application right panel as shown below.

Output:


Excellent blog I visit this blog it's really awesome. The important thing is that in this blog content written clearly and understandable. The content of information is very informative. We are also providing the best services click on below links to visit our website.
ReplyDeleteOracle Fusion HCM Training
Workday Training
Okta Training
Palo Alto Training
Adobe Analytics Training
mmorpg oyunlar
ReplyDeleteINSTAGRAM TAKİPÇİ SATIN AL
tiktok jeton hilesi
Tiktok jeton hilesi
Antalya saç ekim
referans kimliği nedir
İnstagram Takipçi Satın Al
Mt2 Pvp
instagram takipçi
Smm panel
ReplyDeleteSmm panel
iş ilanları
instagram takipçi satın al
Hırdavatçı Burada
beyazesyateknikservisi.com.tr
Servis
tiktok jeton hilesi
çekmeköy mitsubishi klima servisi
ReplyDeletekadıköy bosch klima servisi
maltepe arçelik klima servisi
kadıköy arçelik klima servisi
kartal samsung klima servisi
kartal mitsubishi klima servisi
ataşehir mitsubishi klima servisi
maltepe vestel klima servisi
kadıköy vestel klima servisi
lisans satın al
ReplyDeleteuc satın al
yurtdışı kargo
minecraft premium
en son çıkan perde modelleri
nft nasıl alınır
en son çıkan perde modelleri
özel ambulans
Good content. You write beautiful things.
ReplyDeletekorsan taksi
sportsbet
vbet
sportsbet
vbet
hacklink
mrbahis
taksi
hacklink
Good text Write good content success. Thank you
ReplyDeletemobil ödeme bahis
betpark
kralbet
kibris bahis siteleri
tipobet
slot siteleri
betmatik
poker siteleri
alsancak
ReplyDeleteçankırı
düzce
gaziemir
kaş
JGZ7Z
شركة تنظيف افران eg1b6wmpTQ
ReplyDelete