What Is Service Cloud Console In Salesforce & How To Enable It
 Our certified Salesforce developers are at it again! Another question has been sent to our Salesforce development team hence we thought to share it with the Salesforce user and development world. The question was, “What is Service Cloud Console in Salesforce and how do I enable it on my Salesforce”?
What is the Service Cloud Console?
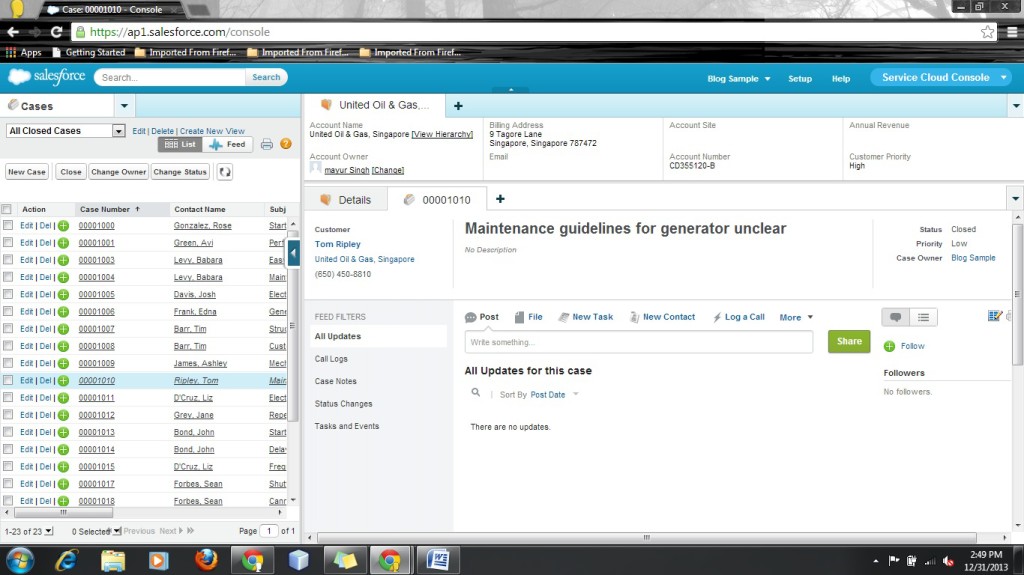
Service Cloud Console is a Salesforce application that is designed for users in a fast-paced environment that need to find, update, and create records quickly. SCC introduces a tabbed environment in which users are able to look at different groupings of records in one screen via a Secondary and Primary tab. It also has agents that are available in the footer (if licensed) as well as it can be programmed to give messages to these agents such as system being down etc. Another notable feature is that it has keyboard shortcuts so that power users are able to save time switching between tabs and saving information. The most notable feature of SCC is that it is very easy to plug in custom Visualforce pages within the console and the ability to build custom integrations directly into the console making it very extendible. Another cool feature is the ability to have an interaction log which allows you to quickly create tasks whilst you are on the phone with customers.
How do I enable the Service Cloud Console in Salesforce?
If you follow this step by step guide, you can easily turn on your Service Cloud Console within Salesforce.
Step 1 – In Salesforce, go to account layout for creating highlighting panel
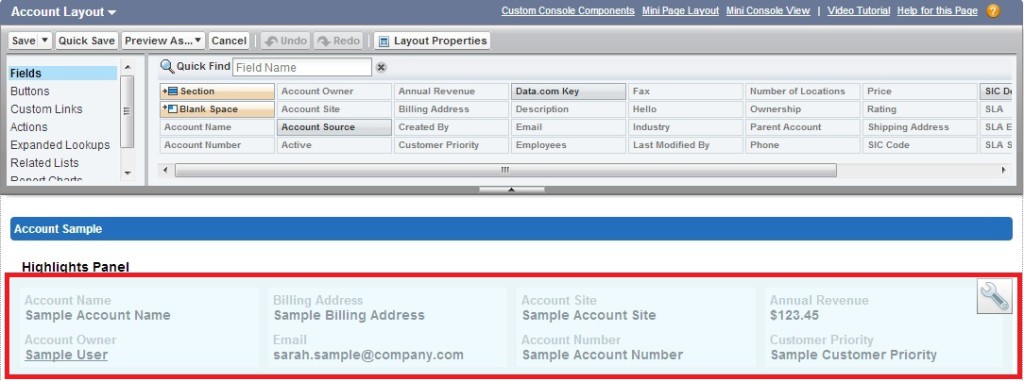
Step 2 – Click on the highlighted portion and selected field for highlight panel in Salesforce and then click OK

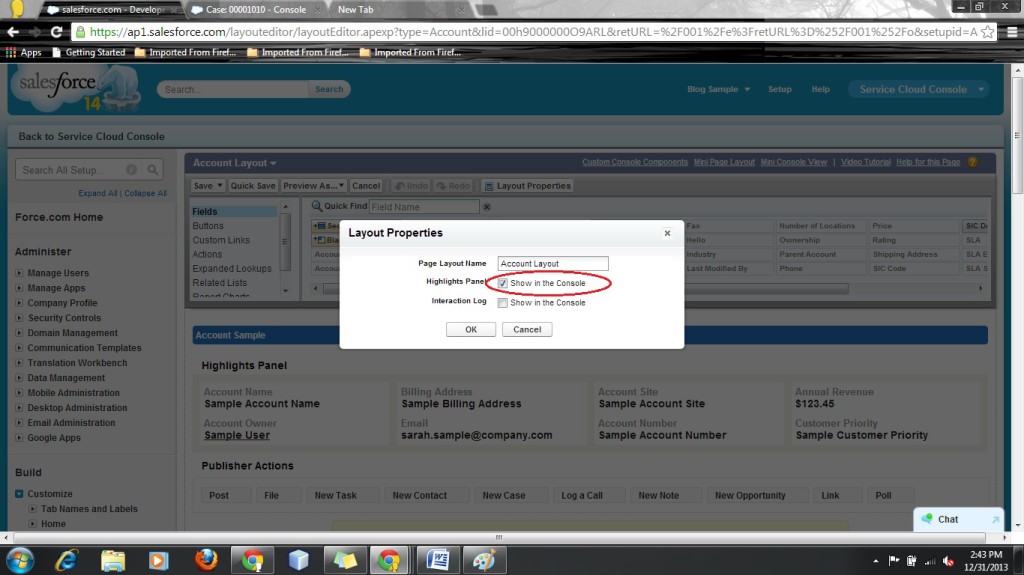
Step 3 – Click on the layout property and click on the highlighting check box, then click the OK button. Lastly save this layout.
Step 4 –
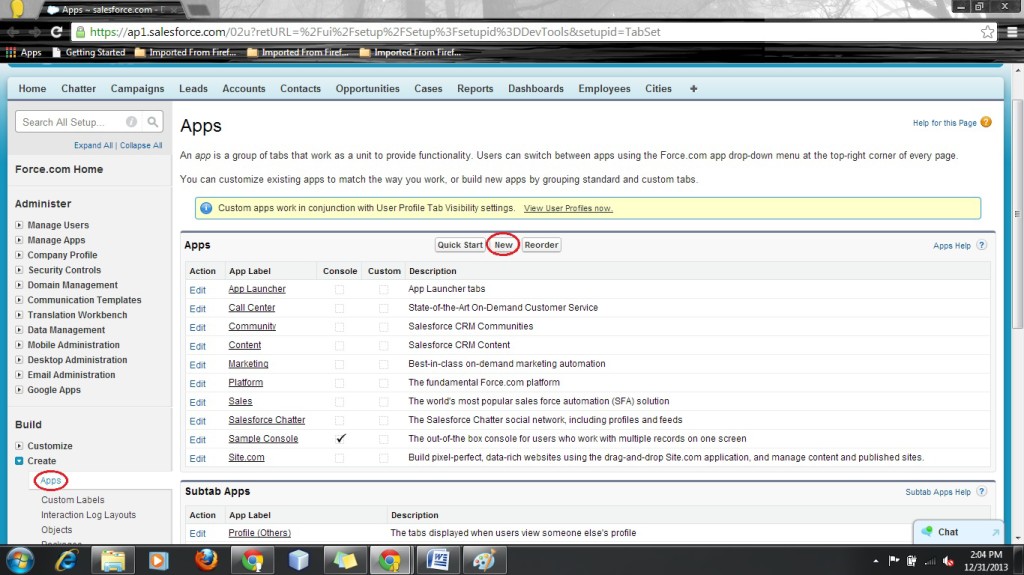
In Salesforce, Go to Setup → Build → Create → Apps
Click on the “New” button to create new Apps
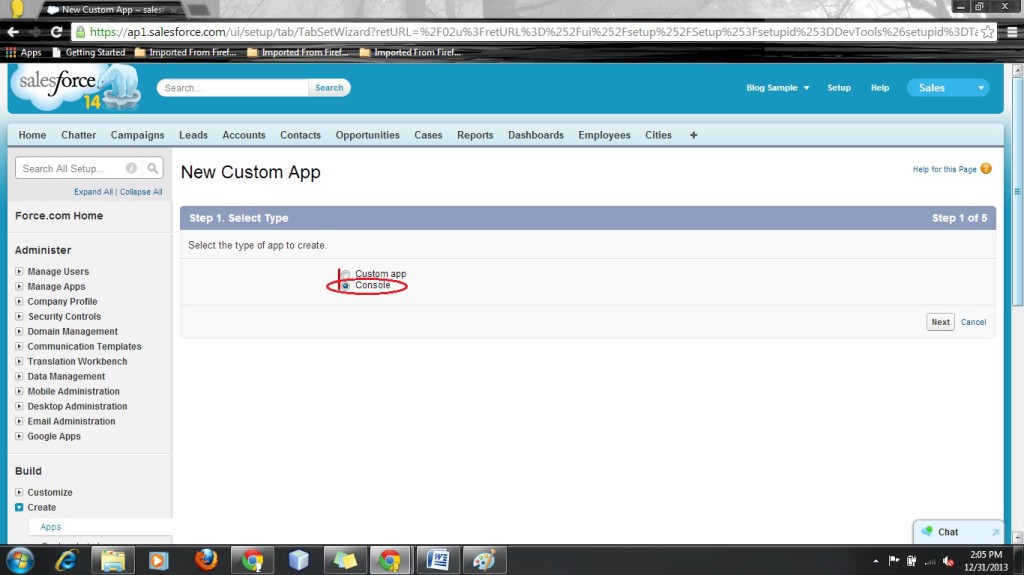
Step 5 – Now select the console type check box
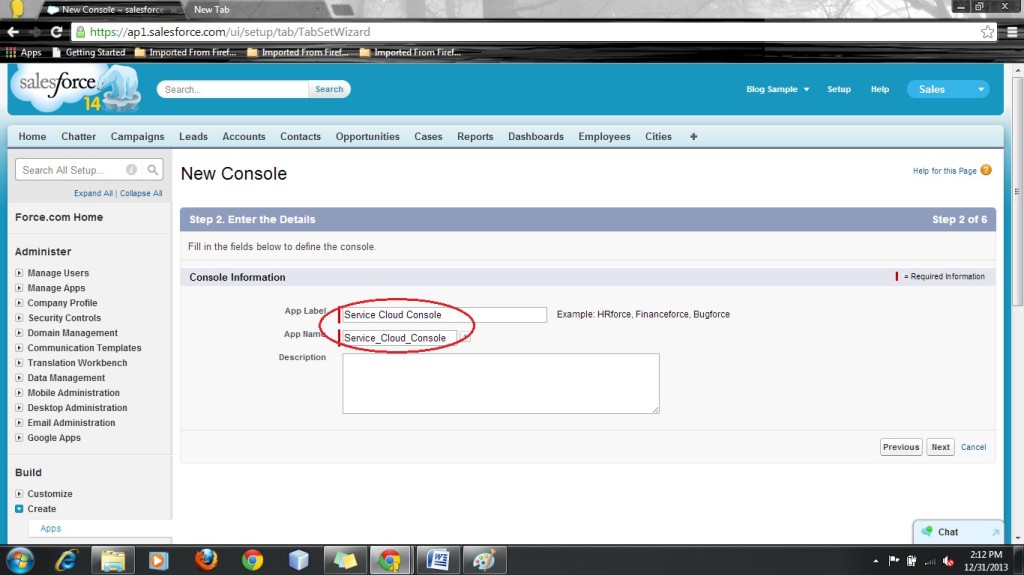
Step 6 – In the app label field type “Service Cloud Console” then click next
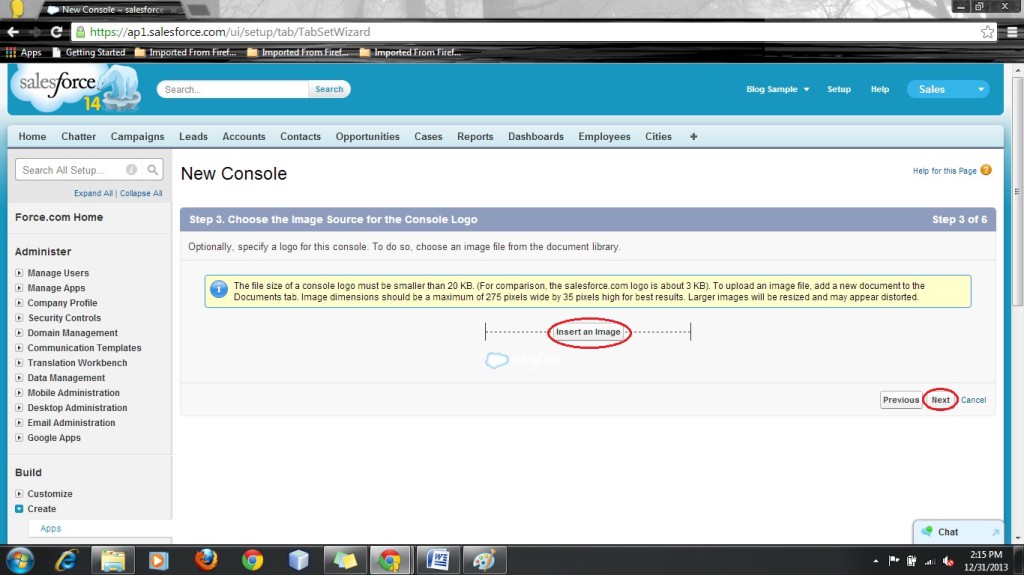
Step 7 – If you want to insert an image for this console in your Salesforce, you can insert it here
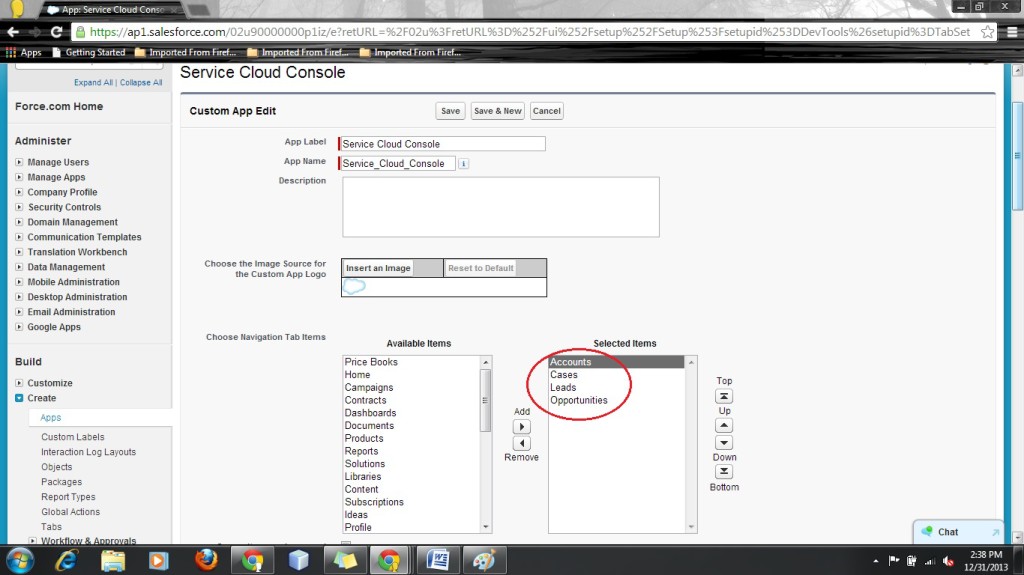
Step 8 – Select the field account, leads, cases and opportunity for navigation tab item, then click next
Step 9 – Here you will see “choose how the record will display”
Select account as a “Primary Tab “
Cases as a “Subtab” of account name
Opportunity as a “Subtab ” of account name
Leads as a “Primary Tab “ and then click next
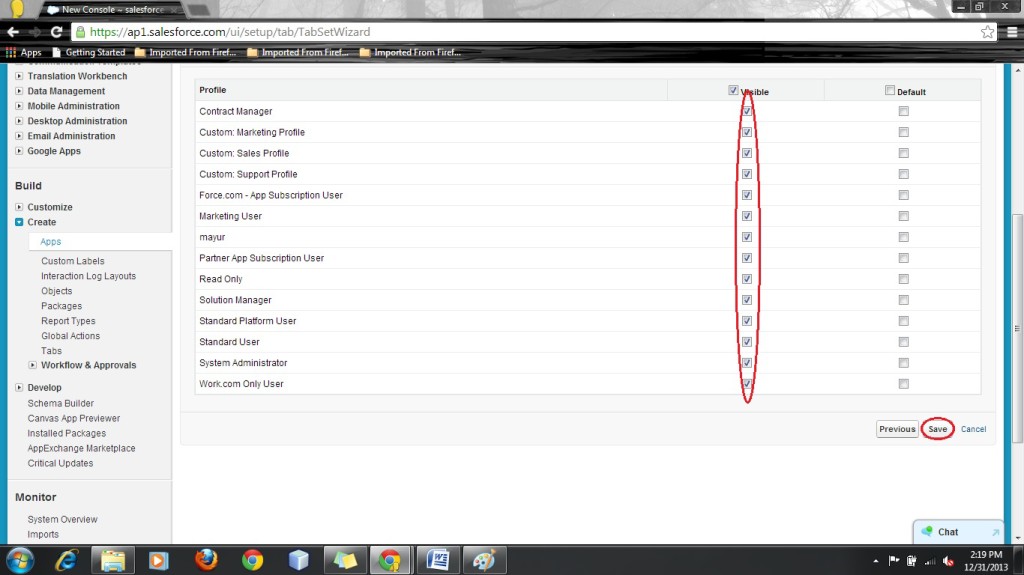
Step 10 – Select all so that all profiles can access this app and then save.
Step 11 – Again edit this app, in the choose list placement block, “Select pinned to left. List are always visible” and set it’s width to 30 percent
In option choose how list refresh → select “refresh list row” and
In option choose how detail page refresh à select “automatically refresh”
“Save” this record now
Step 12 – You can open this console by clicking “Service Cloud Console” in the top right of your Salesforce application. Now you can enjoy your Service Cloud Console application
We hope this step by step walk through of how to enable the Service Cloud Console in Salesforce has proved helpful to users or developers. As always we will be posting regularly around any Salesforce development queries that our team receives. If you need any Salesforce help, please feel free to reach out to our team as we would be more than happy to help with all your Salesforce needs.



No comments:
Post a Comment